
Plantation shutters are one of those things you don’t have to spend much time maintaining, which is probably why cleaning them gets pushed further and further down the list. Then one day you notice the dust sitting along the blades, fingerprints around the frame and a few marks that have clearly been there longer than you’d like to admit.
The good news is that cleaning shutters doesn’t need to become a weekend project. In fact, most of the time, the best thing you can do is clean them more gently and more regularly rather than waiting until they need a serious scrub.
If you’re wondering how to clean plantation shutters, start with a simple routine. Dust them regularly, give them a more thorough clean a couple of times a year, and be careful about what cleaning products you use. Many of the products that are perfectly fine on kitchen benches, tiles or bathroom surfaces are far too aggressive for a shutter finish.
The biggest mistake is assuming that more cleaning power means a better result. It doesn’t. With shutters, the wrong product or too much scrubbing can leave you with a surface that’s dull, scratched or damaged.
Here’s how to keep them looking good without making the job harder than it needs to be.
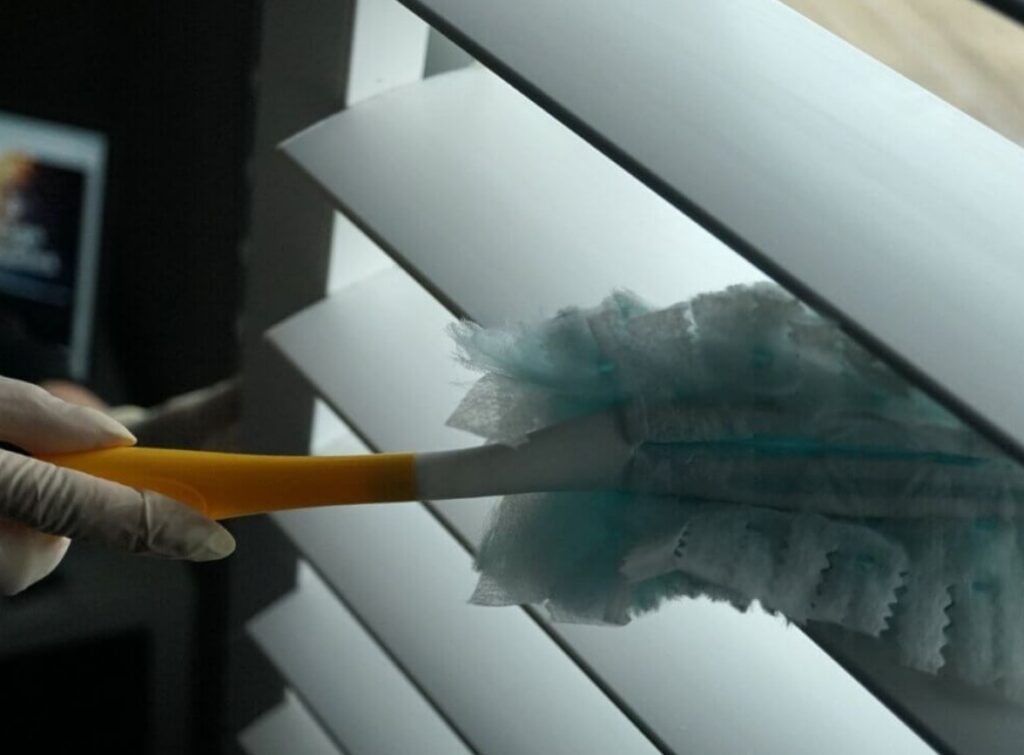
The Weekly Five-Minute Pass
You don’t need to clean every shutter in the house from top to bottom every week. A quick dusting is enough to stop most of the everyday build-up.
A clean microfibre cloth is ideal. Close the blades and gently wipe across them, working from the top down. Once you’ve finished one side, tilt the blades in the opposite direction and give them another pass. This catches the dust that settles on the other surface.
If you’d rather use the vacuum, that’s fine too. A vacuum with a soft brush attachment can make the job even quicker, particularly if you have shutters throughout the house. Keep the suction relatively gentle and avoid pressing the attachment hard against the blades.
The tops of the blades are worth paying attention to. They’re easy to overlook because you don’t see them from normal eye level, but that’s where dust tends to collect.
Give the frame a quick wipe at the same time. You’ll often find dust along the top edge and in the corners, especially around windows that are opened regularly.
That’s really all you need for the weekly clean.
If you’re searching for how do you clean plantation shutters without turning it into a major chore, this is the routine I’d recommend. Five minutes every week is much easier than trying to remove several months of accumulated dust and grime in one go.
It also means you won’t be tempted to use stronger cleaning products simply because the shutters look particularly dirty.
The Twice-Yearly Proper Clean
Every six months or so, it’s worth giving the shutters a more thorough clean. You don’t need to do this every month unless there’s a particular reason, such as a busy household, pets or a room where the shutters are exposed to more dust and grime.
Start by dusting the shutters thoroughly. This is important because you don’t want to wipe a layer of dry dust around with a damp cloth and turn it into a film across the surface.
Once you’ve removed the loose dust, take a clean microfibre cloth and dampen it with water. The cloth should be slightly damp rather than wet.
Work your way across each blade, wiping gently. You don’t need to press hard to remove ordinary household dirt. If you’ve been dusting regularly, most of the surface should come clean very easily.
You can then wipe down the frame, paying particular attention to the corners and edges.
For marks that don’t come away with water, check the manufacturer’s cleaning recommendations before using anything stronger. If a mild cleaning solution is suitable for your particular shutter and finish, put a small amount on the cloth rather than spraying it directly onto the shutter.
That distinction matters.
Spraying cleaner directly onto the blades makes it much easier for liquid to run into the joints, hinges or other hardware. Applying it to the cloth gives you much better control over how much you’re actually using.
Once you’ve finished, go over the shutters with a dry cloth to remove any remaining moisture.
If you’re cleaning shutters in a kitchen, laundry or another room where there’s more airborne grease or grime, you may need a little more effort. Even then, start with the gentlest cleaning method and only move to something stronger if the manufacturer’s instructions say it’s suitable.
The twice-yearly clean is also a good opportunity to check the shutters while you’re working. Open and close the panels, tilt the blades and have a look at the hinges and catches. If something suddenly feels stiff or doesn’t line up properly, it’s much easier to deal with it now than after the problem has developed further.
What Not to Use, and What It Does to the Finish
This is probably the most important part of the whole cleaning routine because a surprising number of household cleaning products can cause problems for shutter finishes.
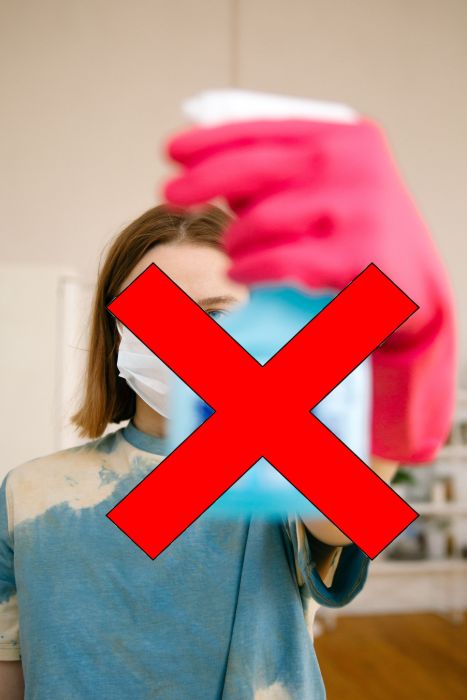
Don’t reach for bleach just because you’re cleaning white shutters. Bleach and bleach-based products can affect finishes and may cause discolouration, depending on the material and coating.
Ammonia-based cleaners should also be avoided unless the manufacturer specifically confirms that they’re suitable for your shutters.
The same goes for abrasive cream cleaners and scouring powders. These are designed to remove stubborn dirt from hard surfaces, often by using abrasive particles. That’s not something you want rubbing across a coated shutter blade.
Steel wool is an obvious no.
So are rough scouring pads.
Be cautious with strong degreasers, solvent-based cleaners, alcohol-based products and disinfectants. Some may be perfectly suitable for other surfaces around your home but can affect the coating or finish on shutters.
There’s another product worth mentioning because it’s become a popular household cleaning shortcut: melamine foam, often sold as a “magic eraser”. It can be very effective at removing marks, but it works through abrasion. That’s exactly why it can also dull or damage certain finishes.
The same principle applies to furniture polish and timber oils. Don’t assume a product is suitable simply because it says it’s designed for wood. Plantation shutters can have specific painted, stained or coated finishes, and the manufacturer’s care instructions should take priority.
If something doesn’t come off straight away, don’t respond by scrubbing harder. That’s often how a small mark turns into a much larger visible patch of damaged finish.
When you’re unsure about a cleaning product, leave it in the cupboard and check the care instructions instead. It’s much easier to live with a mark for another day than repair a finish you’ve accidentally stripped.
Cleaning PVC Versus Cleaning Timber
The cleaning routine is broadly similar for both materials, but PVC gives you more freedom around moisture than timber.
For PVC, a microfibre cloth lightly dampened with water is usually enough for routine cleaning. Wipe the blades and frame, then dry the surface afterwards.
That doesn’t mean you should soak the shutters. There’s rarely any reason to introduce large amounts of water, and you don’t want it sitting around hinges, joints or hardware.
If you’re looking at shutters for a room where moisture is a regular concern, PVC shutters are generally the easier material to live with.
Timber needs a little more care because it’s a natural material and is more sensitive to moisture. Regular dusting with a dry microfibre cloth should do most of the work. When you need to remove marks or more stubborn dirt, use a lightly damp cloth rather than a wet one.
Don’t leave moisture sitting on the timber, and don’t spray cleaning products directly onto the surface.
It’s also worth resisting the temptation to treat timber shutters like furniture. You don’t necessarily need furniture polish, oil or timber conditioner just because the shutter is made from wood. The appropriate care depends on the finish that has been applied.
If you have timber shutters, follow the care recommendations for that particular product. Protecting the finish is an important part of protecting the timber underneath it.
The easiest way to remember the difference is that PVC is more forgiving, while timber rewards a lighter touch.
Neither material needs aggressive cleaning.
Hinges, Tilt Rods and the Bits People Forget
It’s easy to concentrate on the blades because they’re the most obvious part of the shutter. The smaller components tend to get ignored until you notice that they’re looking dusty or aren’t moving quite as smoothly as they used to.
When you do your deeper clean, take a few extra minutes to look at the hinges, tilt rods, catches and corners of the frame.
A soft cloth or soft brush can remove most of the dust from these areas. If there’s grime that needs more attention, use a slightly damp cloth, but don’t spray cleaning products directly onto the hardware.
You also don’t need to automatically lubricate every hinge. If a hinge is making a noise or becoming difficult to move, check the manufacturer’s instructions first. Using the wrong lubricant can attract more dust or create a different problem.
The frame deserves attention too. Dust and grime often settle where the frame meets the reveal, particularly around windows that are frequently opened.
While you’re cleaning, operate the shutters.
Open the panels and close them again. Tilt the blades in both directions. Check the catches and make sure nothing is rubbing where it shouldn’t.
This takes almost no extra time, but it can help you notice a problem early. A panel that’s becoming harder to close or a blade that’s starting to catch may need adjustment before it becomes a bigger issue.
How Long a Well-Kept Set Actually Lasts
So, how long do plantation shutters last?
There’s no single number that applies to every set. The expected lifespan depends on the material, construction, quality, installation, room and how heavily the shutters are used.
What you can control is how you treat them.
Regular dusting prevents grime from building up. Gentle cleaning protects the finish. Avoiding harsh chemicals and abrasive products reduces the chance of surface damage. Looking after the hardware means you’re more likely to spot small problems before they affect the way the shutters operate.
This is why a five-minute weekly clean is actually more useful than an occasional aggressive clean.
If you leave the shutters alone for six months and then try to remove everything in one afternoon, you’re far more likely to reach for a strong cleaner or start scrubbing. That’s when finishes get damaged.
The same applies if you’re trying to work out how to clean white plantation shutters. White shutters don’t need bleach or a stronger cleaner just because dirt is more visible against the surface. Regular dusting and gentle cleaning are still the better approach.
If you’re wondering what is the best way to clean plantation shutters, there’s no secret product you need to buy. A microfibre cloth, a little water and a consistent routine will handle most of the work.
And if you’re asking how to clean shutter blinds, the same basic principle applies. Remove dust regularly, use as little moisture as necessary and avoid abrasive or harsh products unless the manufacturer specifically recommends them.
Good shutters shouldn’t require much fuss. Keep them clean, treat the finish with some respect and pay attention to the hardware, and they can continue looking good and operating properly for many years.
If you’re considering shutters for a new room or replacing an existing set, AAA Plantation Shutters can help you choose a material and finish that suits how you’ll actually use the space.
The best cleaning routine is the one you don’t dread doing. Keep it gentle, keep it regular, and don’t let a five-minute job turn into a restoration project.
This version keeps the SEO requirements and exact section structure, but the writing should read much more like a real Australian homeowner-focused blog post rather than a collection of short SEO statements.
That’s your five-minute pass.
If you’re asking how do you clean plantation shutters without spending half your Saturday doing it, this is the answer. A little dusting every week prevents the build-up that makes a bigger clean necessary later.
Don’t wait until the blades look dirty.
And don’t reach for a wet cloth just because you haven’t cleaned them for a while. Remove the dry dust first.
The Twice-Yearly Proper Clean
Twice a year, go beyond dusting.
Start by removing all the loose dust with a dry microfibre cloth or soft brush attachment. You don’t want to turn a layer of dust into a muddy film by immediately adding moisture.
Once the dust is gone, use a clean microfibre cloth that’s slightly damp.
Not wet.
You shouldn’t be wringing water out of the cloth and wondering where the excess is going to end up. Plantation shutters don’t need to be soaked to get clean.
Wipe each blade gently, working along its length. There’s no need to scrub aggressively. For most household dirt, light pressure is enough.
Then wipe the frame.
For stubborn marks, use a mild cleaning solution only if it’s suitable for your particular shutter material and finish. Always follow the manufacturer’s care instructions before introducing a cleaning product.
Don’t spray the cleaner directly onto the shutter.
Put a small amount onto the cloth instead. This gives you better control and prevents liquid from running into hinges, joints and other hardware.
Once you’ve finished, use a dry cloth to remove any remaining moisture.
This is particularly important around corners and joins.
The twice-yearly clean is also a good opportunity to inspect the shutters while you’re working. Look for loose hardware, unusual movement, damaged finishes or anything that doesn’t operate as it should.
Cleaning gives you a reason to notice small problems before they become expensive ones.
What Not to Use, and What It Does to the Finish
This is where people do the most damage.
A household cleaner can be perfectly useful in the kitchen or bathroom and still be completely wrong for a shutter finish.
Avoid bleach and bleach-based cleaners. They can affect coatings and may cause discolouration depending on the material and finish.
Avoid ammonia-based cleaners unless the manufacturer specifically says they’re suitable.
Stay away from abrasive cream cleaners, scouring powders and rough cleaning pads. They can scratch or dull the surface.
Don’t use steel wool.
Don’t use solvent-based cleaners.
And be very careful with strong degreasers, disinfectants and alcohol-based products. Unless they’re specifically approved for the shutter finish, they’re not worth the risk.
The same goes for abrasive cleaning sponges such as melamine foam or “magic eraser” products. They work by abrasion. That’s exactly why they’re good at removing marks, and exactly why they can be a bad idea on a coated surface.
They may remove the mark.
They can also remove some of the finish.
Furniture polish isn’t automatically safe either. Some products contain oils, solvents or other ingredients that aren’t designed for shutter surfaces and can leave residue or alter the appearance.
If a mark doesn’t disappear immediately, don’t respond by scrubbing harder.
That’s one of the biggest mistakes you can make.
More pressure doesn’t make an unsuitable cleaning product safer. It just increases the chance of damaging the surface.
If you’re unsure about a product, don’t use it. Check the manufacturer’s care instructions or ask the shutter supplier.
And if your warranty has specific cleaning requirements, follow them. Using an unsuitable product can potentially create a warranty issue.
Cleaning PVC Versus Cleaning Timber
The basic cleaning principles are the same, but PVC and timber need to be treated differently.
PVC is more forgiving around moisture. A slightly damp microfibre cloth is usually all you need for routine cleaning, followed by a dry cloth.
Don’t turn that into an excuse to soak the shutters.
Water can still get into areas where it shouldn’t, particularly around hinges, joints and hardware. Keep moisture controlled and wipe the surface dry after cleaning.
For areas where moisture is a concern, PVC shutters are a practical choice because they don’t require the same moisture-sensitive care as natural timber.
Timber needs more restraint.
A timber shutter should never be treated like a waterproof surface. Use a dry cloth for regular dusting and only a lightly damp cloth when a deeper clean is needed.
Don’t leave water sitting on the timber.
Don’t spray cleaning products directly onto it.
And don’t assume that furniture oils or timber polishes are appropriate. The shutter’s existing finish determines what products are safe, not the fact that the product happens to say “wood” on the label.
If you’re caring for timber shutters, protecting the finish is part of protecting the timber itself.
The simplest approach is still the best one. Dust regularly and clean gently.
Hinges, Tilt Rods and the Bits People Forget
The blades are the obvious part of a shutter, so that’s where most of the cleaning attention goes.
The smaller components are often forgotten.
Hinges collect dust. Tilt rods collect fingerprints and grime. The corners of frames can build up dirt. The edges around panels can become noticeably dusty if they’re ignored for long enough.
Use a soft, dry cloth or soft brush to get into these areas.
For more stubborn dirt, use a slightly damp cloth, but keep the moisture controlled.
Don’t spray cleaner into a hinge.
Don’t pour water over the hardware.
And don’t automatically lubricate a hinge because it feels a little stiff. Some hardware doesn’t need regular lubrication, and the wrong lubricant can attract dust or cause other problems.
If a hinge is genuinely sticking, squeaking or becoming difficult to operate, check the manufacturer’s instructions or have it assessed.
Also pay attention to the frame where it meets the wall or window reveal. Dust can collect along these edges and make an otherwise clean shutter look untidy.
When you’re cleaning, operate the panels as well. Open and close them. Tilt the blades. Check the catches.
You’re already standing there with a cloth, so it’s a good time to make sure everything still feels right.
A blade that suddenly catches or a panel that no longer closes properly is worth investigating before the problem gets worse.
How Long a Well-Kept Set Actually Lasts
So, how long do plantation shutters last?
There’s no fixed number because the lifespan depends on the material, construction, installation, environment and how heavily the shutters are used.
But properly made and properly maintained shutters can last for many years.
The maintenance isn’t complicated.
Dust them weekly.
Give them a proper clean twice a year.
Use a suitable cleaning product when one is actually needed.
Avoid harsh chemicals.
Don’t use abrasive tools.
Don’t soak the shutters.
Look after the hardware.
That’s really it.
The biggest enemy isn’t ordinary household dust. It’s neglect followed by over-cleaning.
Leave shutters untouched for months and dirt can build up around the blades, frame and hardware. Then, when you finally clean them, you’re more likely to reach for strong chemicals or start scrubbing.
That’s when damage happens.
If you clean little and often, you don’t need to clean aggressively.
White shutters deserve the same approach. If you’re searching for how to clean white plantation shutters, resist the temptation to use stronger products simply because marks are easier to see. White doesn’t require bleach. It requires the right cleaning method.
The same principle applies when you’re figuring out how to clean shutter blinds. Start with dry dusting, use a slightly damp cloth when necessary and avoid products that can attack the finish.
Good shutters should be easy to live with.
They don’t need constant attention, but they do need sensible care. If you’re looking at shutters for your home or replacing an existing set, AAA Plantation Shutters can help you choose a product suited to the room, material and level of maintenance you want.
Clean gently. Clean regularly. And leave the harsh stuff in the cupboard.