Looking for PVC and Wood Shutters Melbourne Supplier ? AAA supplies both indoor plantation shutters as well as outdoor using Aluminium Shutters to all customers in Great Melbourne areas.
So you’ve decided to install plantation shutters—good for you. They’re a great way to add elegance to your home as well as allowing you to control light and privacy. At AAA Plantation Shutters, we want to make the installation process as straightforward for you as possible and have a step-by-step guide that will have you basking in the beauty of your handiwork in no time.
Hanging plantation shutters has never been more simple—so without further ado, let’s get to it.
Step 1: Parts Overview
Before you start diving into the installation process, you’ll need to familiarize yourself with the necessary components, included in your shutter package.
Your new plantation shutters will normally come with:
Shutter panels: These are packed in rectangular boxes.
Frames: Provided in a separate, longer box to prevent damage during shipping.
Hardware kit: Containing essential bits and pieces.
Touch-up paint: A small bottle for minor corrections after installation.
The hardware kit typically includes:
Screws of varying lengths: Longer ones for assembling the frame and shorter ones for securing the hinges.
Magnet plates: To keep the shutter panels securely closed.
Hinge pins: For attaching the panels to the frames.
Plastic Hoffman key: Available in different sizes for frame assembly.
To ensure a smooth installation, gather the following tools:
Pencil: For marking bracket placements.
Star-headed screwdriver or power drill: To speed up the process.
Measuring tape: For precise measurements.
Appropriate screws and wall plugs: Suitable for your wall type, whether it’s plaster, wood, or steel.
Additional recommended tools include a spirit level, decorator’s caulk, and packing materials like cardboard or wedges to help you install your shutters evenly and securely.
Step 2: Frame Assembly
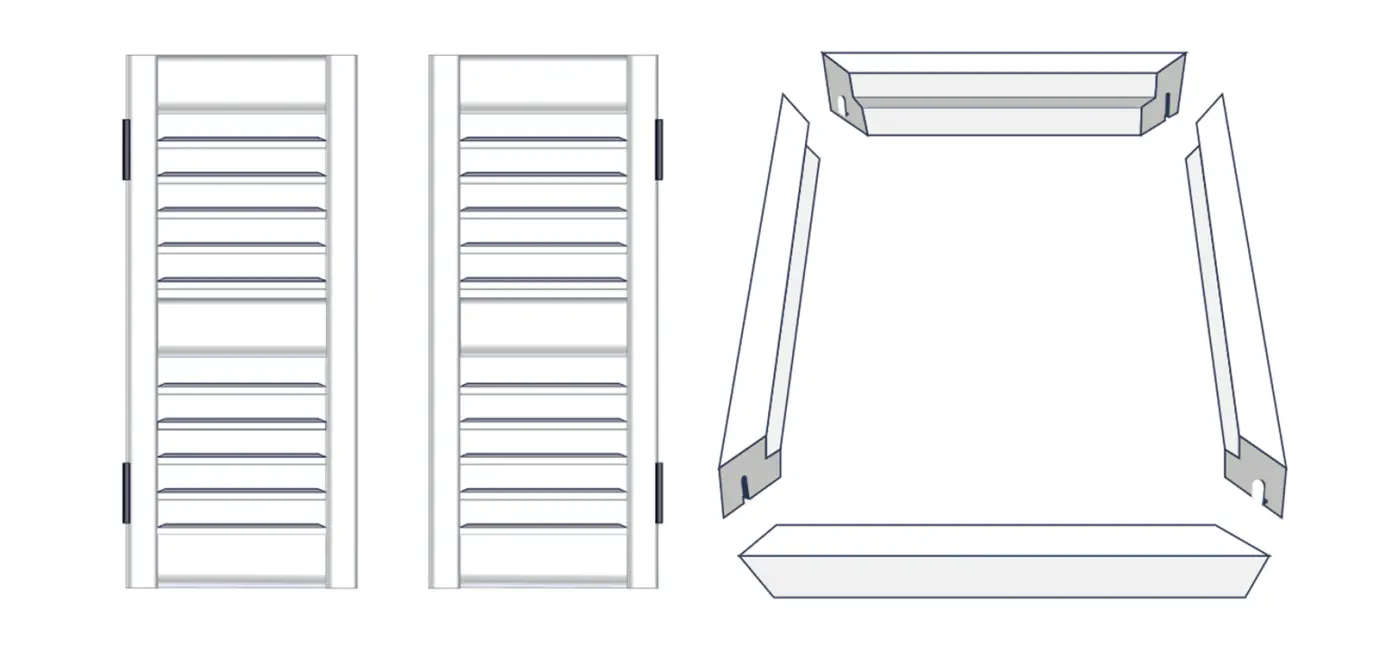
Begin by laying out all the frame pieces. Identify the sides, as they are marked at the mitred ends: ‘T’ for top, ‘R’ for right, ‘L’ for left, and ‘B’ for bottom.
- Lay the frame sides face down
Place them on a flat surface to prevent scratching.
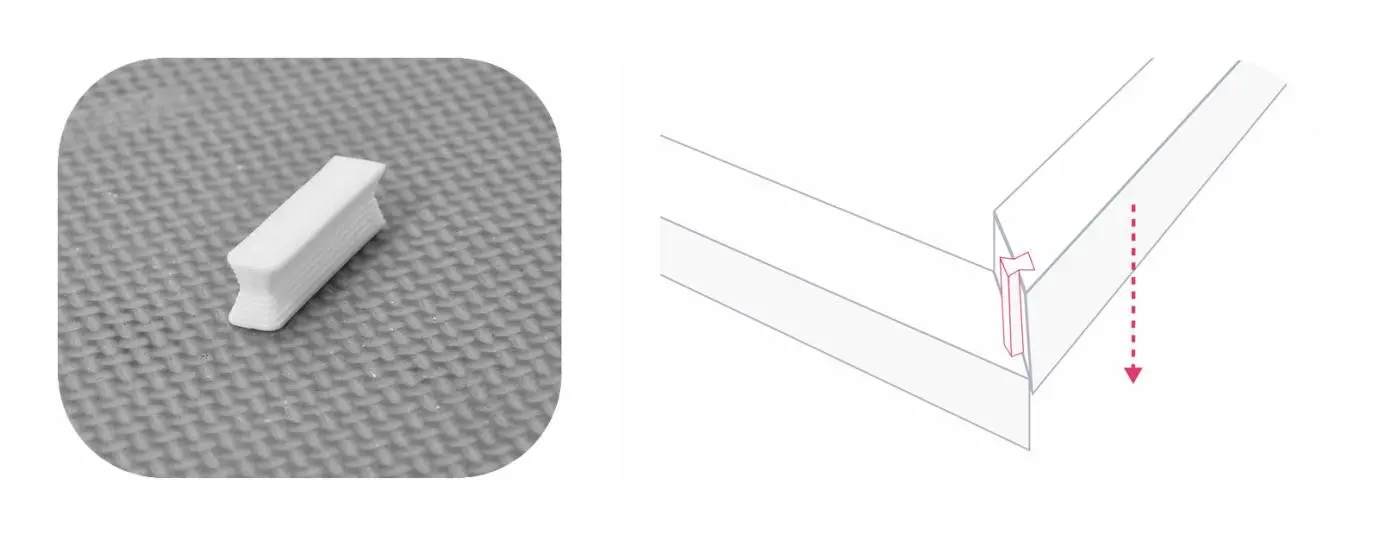
- Connect the frame sides
Use the plastic Hoffman keys (included with your shutters) to connect the frame sides. If necessary, gently tap them into place with a hammer or mallet, using cardboard or cloth to protect the frame.
- Attach the build-out piece
If your frame includes a build-out piece, attach it to the back of the frame now. This piece provides additional depth to the frame, accommodating window handles or other protrusions.
It’s important that you take the time to make sure all the pieces fit together snugly and that the frame is square and level.
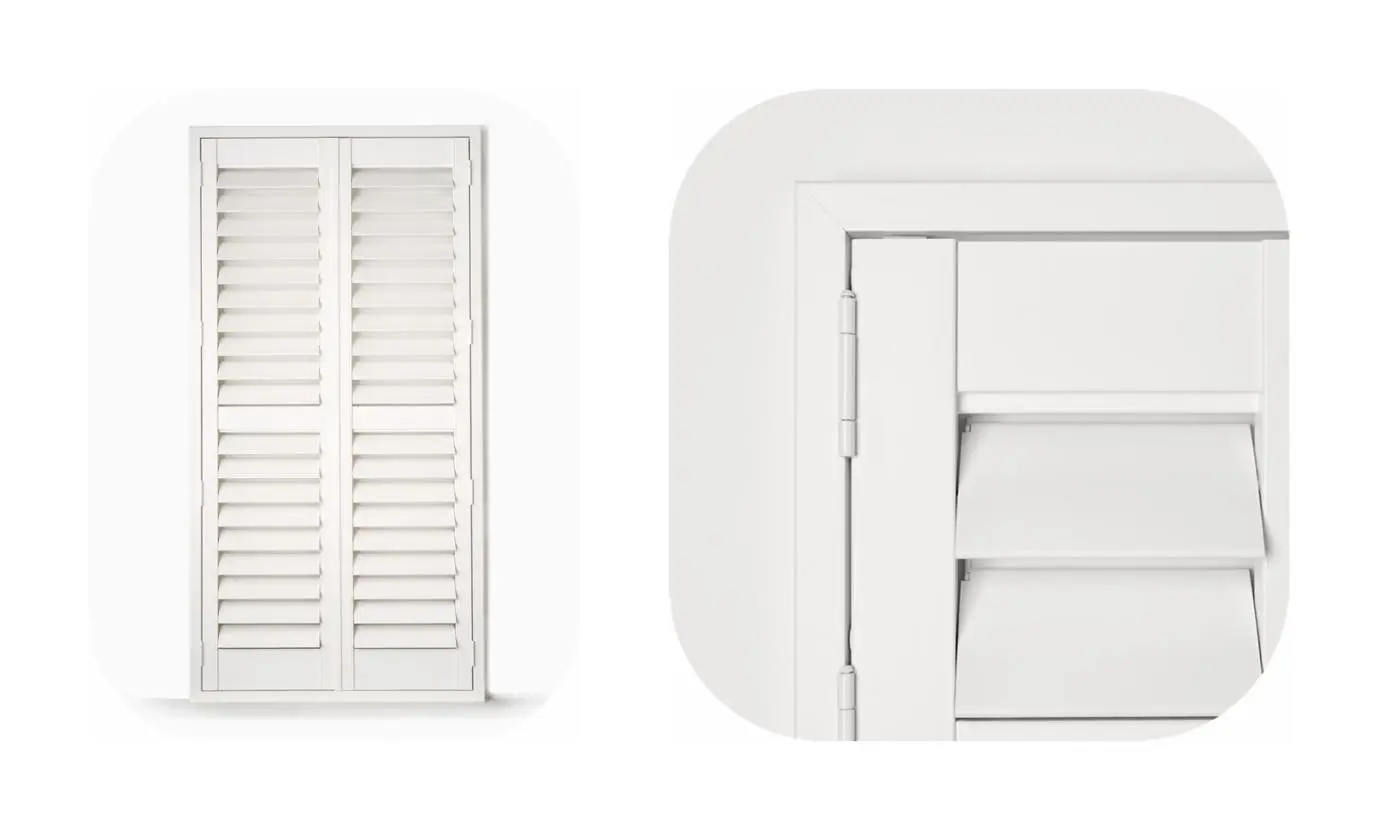
Step 2b: T-Post Assembly
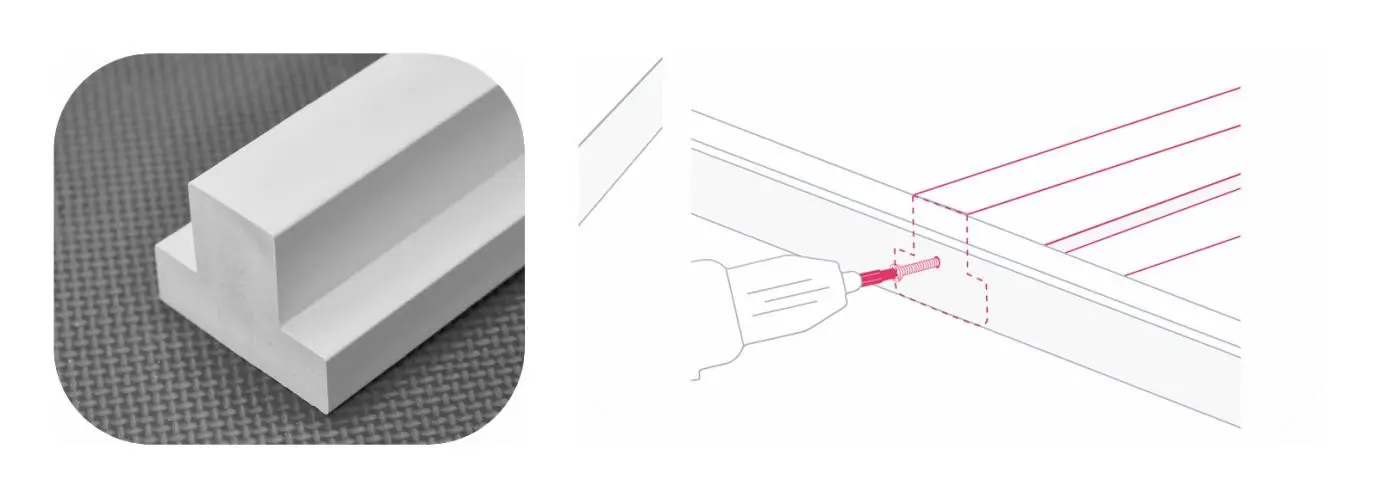
If your shutters include a vertical T-post (common in Full Height shutters), secure it in place with the supplied screws.
Vertical T-Post: Provides additional support and structure.
Horizontal T-Post: This separates the top and bottom tiers of panels in Tier on Tier shutters.
Make sure the T-post is level and securely fastened. This boosts the structural integrity of your shutters, ensuring they operate smoothly and last for years.
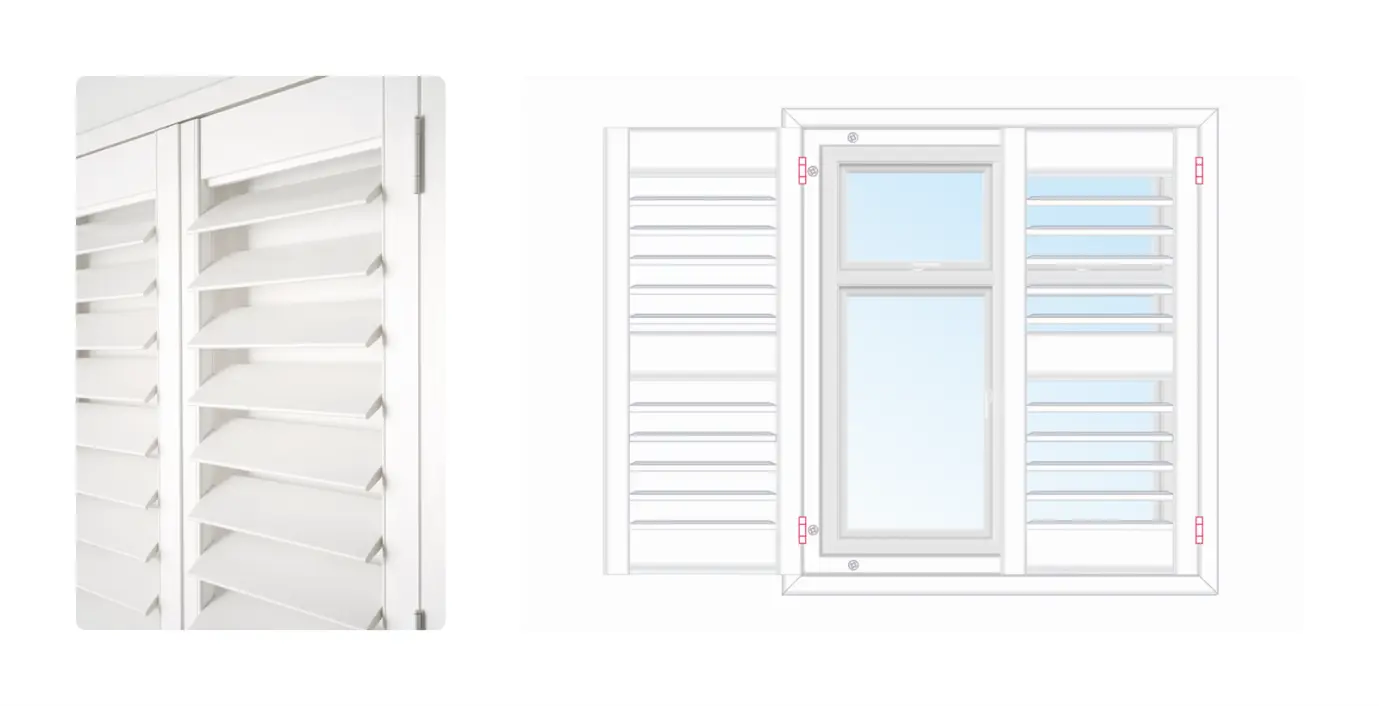
Step 3: Attach Frame to Window

Determine if you’re installing the shutters inside or outside the window frame. Keep in mind that an exterior mount is preferable for bay windows, providing better mobility. Also, it’s helpful to have a second person hold the frame while you insert the screws to ensure everything stays in place.
- Position the frame
Place the frame in the window and ensure it fits correctly.
- Secure the top of the frame
Attach the top of the shutter frame to the window with screws. Insert only the top screws initially, leaving the bottom of the frame free to move.
- Check for level
Use a level to ensure the frame is even. This step is crucial for the smooth operation of the shutters.
If the frame doesn’t fit perfectly, it might indicate that the frame wasn’t assembled correctly or the measurements were inaccurate. Double-check your assembly and measurements before proceeding.
Step 4: Attach Panel to Frame

Identify which panels correspond to each frame. Labels should help with this.
- Lift the panel
Align it with its frame.
- Use hinge pins
Attach the panel to the frame using hinge pins. Drop a pin into each hinge to secure the panel.
If the pins don’t fit easily, you can loosen the hinge screws, adjust the hinge position, and then re-secure the screws once the pins are in place. This makes sure the panels are securely attached and will operate smoothly.
Step 5: Final Adjustment
Pay careful attention to panels and frame, making sure they align perfectly. Open and close the panels to check they fit properly within the frame, with no significant gaps or misalignments.
- Adjust the frame and panels
Move the frame and panels as necessary to achieve a perfect fit.
- Insert remaining screws
Once aligned, insert the remaining screws into the bottom of the frame and any other necessary positions. Double-check alignment after each screw is inserted.
Using a level throughout this process helps keep the shutters straight and operating correctly. Minor adjustments may be needed to achieve a perfect fit.
Step 5b: Panel Close – Magnet and Catch
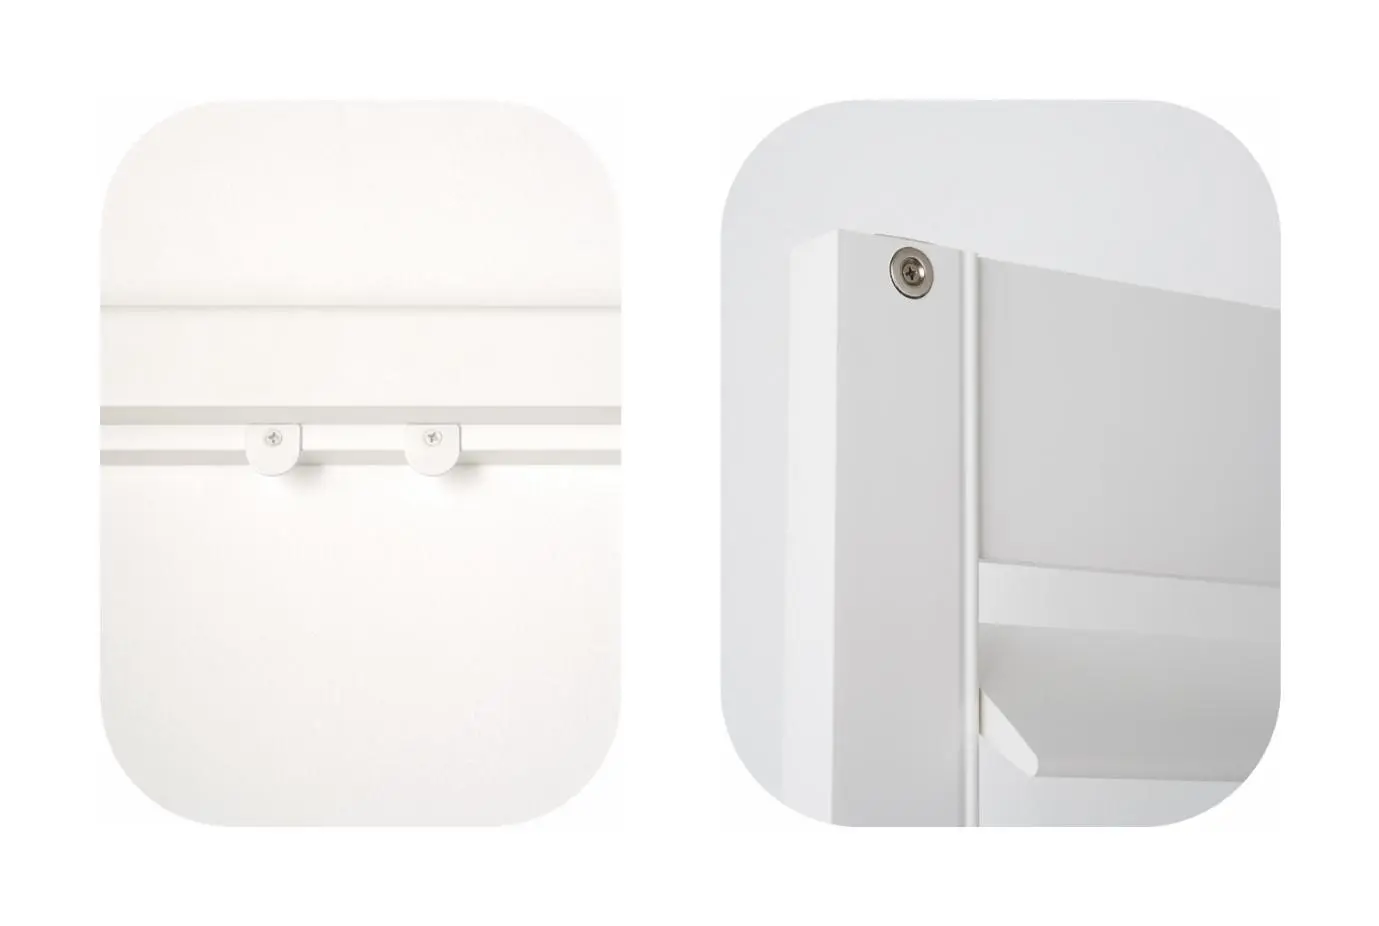
For shutters with two hinged doors, use the supplied magnet receivers to keep the panels closed securely.
- Insert a screw through the magnet hole
Make sure it’s pointing outwards.
- Attach the magnet
Secure it to the lead door and close the doors gently.
- Press the panel
Press it against the screw to mark the hole position.
- Remove the magnet
Screw the receiver into the marked position and reattach the magnet.
- Align the panels
Tap them until the magnet and receiver click together, holding the panels closed.
Finished!
Congratulations! You have successfully installed your plantation shutters. Now all you need to do is take a step back and admire your work. We hope your shutters work beautifully and that the curb appeal of your home grows accordingly.
If you have any problems or questions, please don’t hesitate to contact us. You can get in touch with AAA Plantation Shutters here.
About AAA Plantation Shutters
Based in Melbourne, Australia, AAA Plantation Shutters has been offering high-quality, Australian-made fitted window shutters in wood, PVC, and aluminium since 2017. With our own manufacturing facility in Dandenong VIC, we provide express shutters with a quick 10-day turnaround. We serve all Melbourne suburbs, offering a hassle-free service from initial measurement to final installation. Our shutters come with a 10-year structural warranty and our skilled team delivers exceptional customer service, which means we make improving the beauty and value of your home an easy thing to achieve.